About this video
Take Control of Your 3D Prints with These Essential Slicer Settings
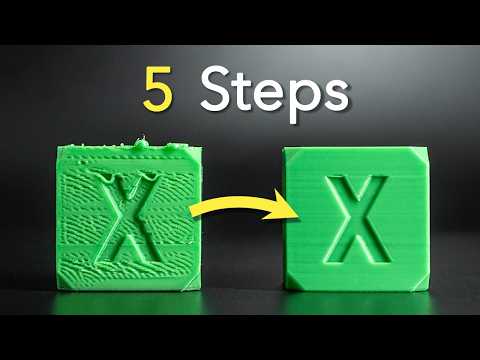
Most 3D printing failures stem from overlooked slicer settings. Rather than letting your printer run on autopilot, these 10 adjustments put you in the driver's seat for consistent, high-quality results.
1. Preset Settings and Layer Height
Presets act like resolution settings for your printer. The layer height you choose directly impacts print quality versus print time—smaller layers mean smoother results but longer prints. A game-changing feature is variable layer height, which automatically adjusts layer thickness based on part detail. This optimization gives you the best of both worlds when you're pressed for time.
2. Wall Count for Strength
The wall count (V count) determines solid layers between infill and the outer shell. More walls mean stronger parts but increased filament usage and print time. For functional parts that need durability, increase the wall count. For quick prototypes, reducing to a single wall saves significant time. Advanced tip: setting wall count to zero prints only the infill pattern—useful for custom support structures.
3. Infill Density and Pattern
Infill has two key components: density and pattern. For most prints, 15% density works well—anything above 20% is often excessive. The pattern matters more than many realize; default lines rarely perform best. Honeycomb and gyroid patterns offer excellent reliability. For rapid prototypes, try lightning infill at 5% density for maximum speed with minimal waste.
4. Brim for Bed Adhesion
Brim adds initial layers around your print to improve plate adhesion. Always verify automatic brim settings—slicers sometimes add brim where it's unnecessary, complicating post-processing. Increasing brim width directly improves adhesion for stubborn prints.
5. Filament Presets and Calibration
Mismatched filament presets cause most nozzle clogs. Match your filament brand to the correct preset, or use generic settings with testing. Run three essential calibrations: temperature tower, flow ratio, and max volumetric speed. Pick one brand and master it—consistency beats constantly switching materials.
6. Temperature Settings
Bed and nozzle temperatures require personal adjustment based on your environment. If prints detach, raising bed temperature keeps the first layer slightly liquid for better adhesion. Always run a temperature tower test—incorrect nozzle temperature can cause permanent clogs requiring costly replacements.
7. Print Orientation
Orientation significantly affects part strength and support requirements. FDM printing creates inherent break points along layer lines. Printing at angles can reduce support needs dramatically—a flat shelf printed at 45° requires far less support than lying flat.
8. Speed Settings
Adjust outer wall speed separately for detailed parts where surface quality matters. Slowing the first layer improves bed adhesion. Variable speed settings adjust printing pace based on layer complexity—ideal for parts that are simple at the bottom but detailed at the top.
9. Support Configuration
Normal supports work best for simple shapes, while tree supports reach detailed areas with branches. For large flat surfaces, use snug normal supports with increased interface layers for easier removal. Newer slicers offer auto-orientation to minimize support material automatically.
10. Wall Generation Methods
Arachne wall generation intelligently adjusts to part geometry—it recognizes when features are smaller and prints them accordingly. This adaptive approach gives prints more precision and intelligence compared to classical fixed-width methods.
Frequently Asked Questions
What layer height should I use for functional parts? Aim for 0.2mm or lower for strength without excessive print time.
Can I print with zero walls? Yes—useful for creating lightweight support structures or prototypes.
How do I prevent prints from failing? These 10 settings address 99% of common printing issues when properly configured.